Hello hello friends! Welcome back to another article! I can’t believe it’s Friday already. My goodness this week has flown by. It seems like just yesterday I was sitting here typing up my last article, thinking of ways to justify my numerous rants. If you have no idea what I’m talking about, and you lowkey have FOMO, then check out that previous article by clicking here. So I’m gonna be real honest with you all for a second. I have a problem. I’ve had this issue since I was a very teeny tiny little dudette… I have an obsession with Christmas. I’m talking listening to Christmas music in the summer, watching Christmas movies year round, eating candy canes in the middle of August, sniffing Christmas candles in September… you name it, I probably do it. Now I’m not gonna lie, I have no issue with this problem. I actually enjoy my passion for Christmas. I’m proud of it. Every day when I look at my Christmas Countdown app on my phone, it just makes me so happy. It’s kinda a catch 22 though because I also looooooove spring and summer. I’m a spring baby so that’s my soul in its element, but there’s just something about Christmas that I’m straight up addicted to. So that brings us to the purpose of this article. No, I’m not just going to talk about my love for Christmas; I’ll spare you. But we are talking something related to Christmas, which now I realize you already know because you read the title of the article. Well that took the fun out of the surprise game.
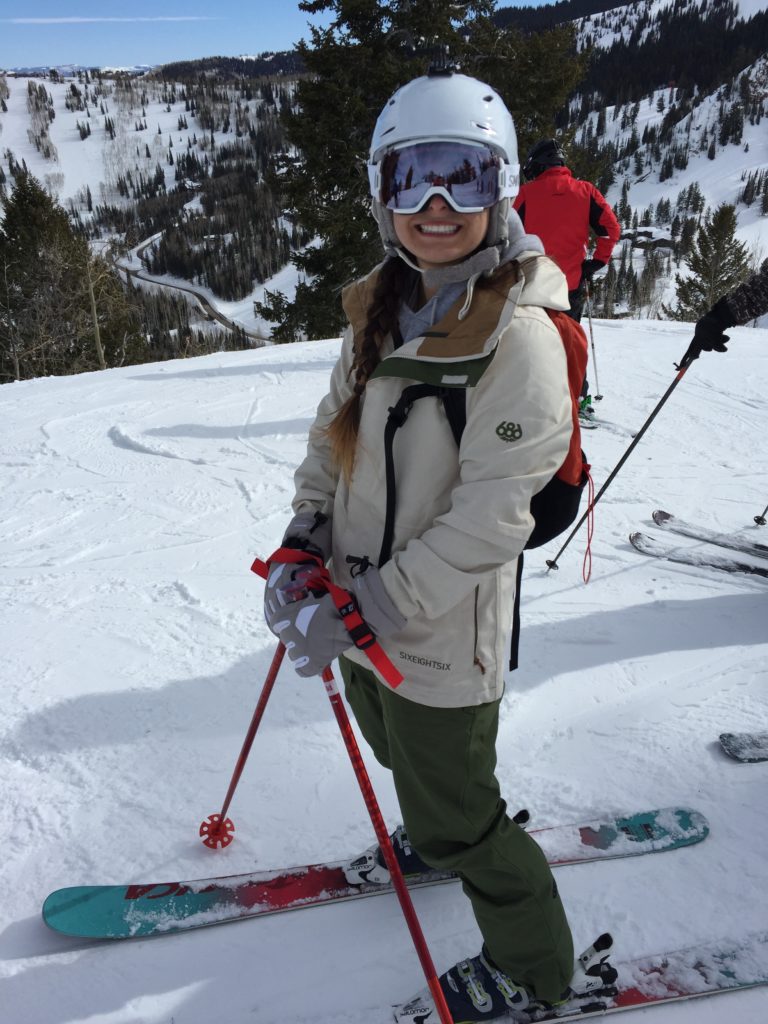
That’s right… you guessed it (actually you didn’t, you just read the title), SKIING! Now how does skiing have anything to do with Christmas?? Come on, it’s the classic 6 Degrees of Kevin Bacon. Christmas is in December, December is in the winter (unless you’re south of the hemisphere in which case you’re just living it wrong), winter is cold, cold brings snow, snow brings snow activities, snow activities means SLEDDING. BAM. Wait, no, I meant to say SKIING. Snow activities bring skiing!!! And now you’re probably wondering why the heck am I talking skiing in July. Duh, Christmas in July. It’s a thing, look it up. Sheesh.
I love skiing. Not as much as I love Christmas, but really close. However, I’ve noticed that many people don’t fully understand how to train for skiing, so they either don’t train at all (yikes), or they just do bodybuilding and cardio to build up muscles and conditioning. While something is better than nothing, neither of those options are something. Just kidding, I’d rather you get some type of muscle activation than nothing at all. But there’s a lot of common misconceptions when it comes to programming for skiing, and I want to help you all out with 1 of those errors.

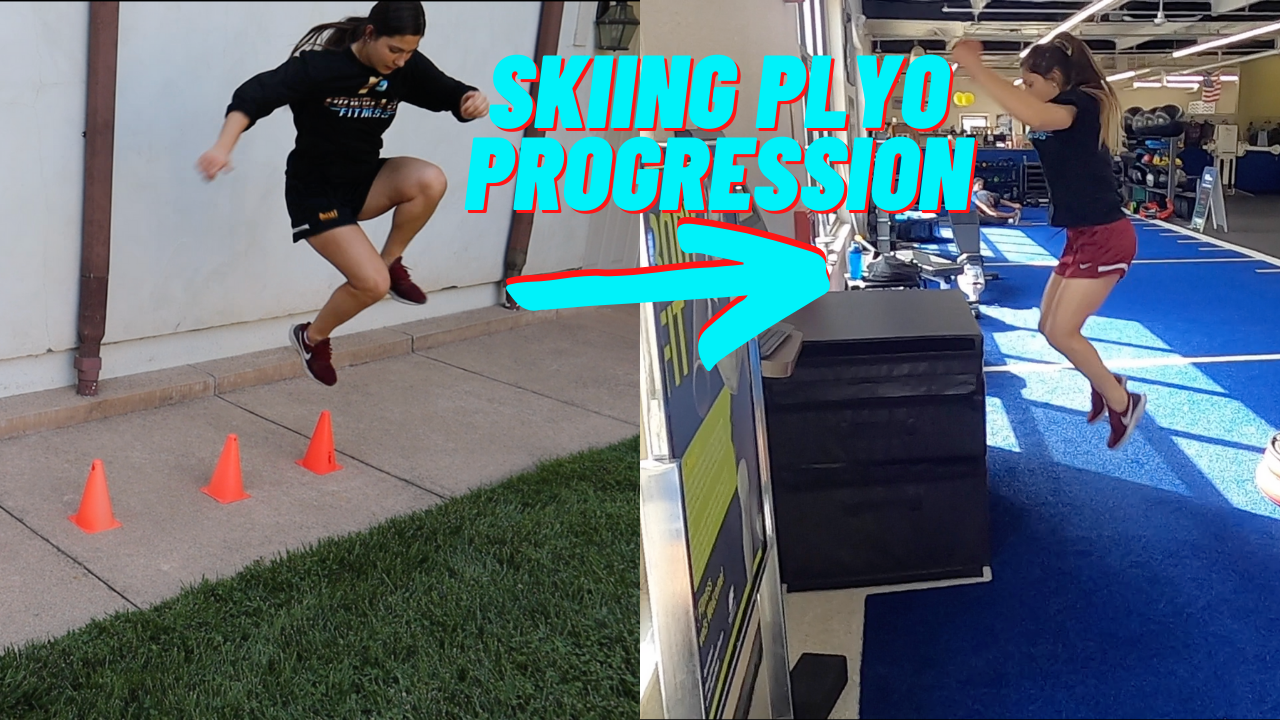
As the article title says, I want to help you guys with lower body plyometrics for skiing. Now, this 1 addition to your training routine will literally make so much difference in your skiing, I promise. Imagine making this addition and then making a few other changes to your program, so you’d actually be training like a skier…. Lindsey Vonn, watch out, girlfriend! Even though she’s retired, I’ve heard she’s competitive, so yes, she will come out of retirement just to take you on and kick your ass, so you have to ALWAYS BE PREPARED!! UNAAAGGGIIIII. If you don’t get that reference, we can’t be friends. No pun intended.
Plyometrics are absolutely critical when it comes to skiing and any sport. I think people just associate plyos with box jumps and other exercises that they don’t think they need in their routine. I’ve actually heard people say that they think burprees are plyometrics. That is everything wrong with unqualified people dishing out information in the fitness industry. Not to start that rant up again because we both know I’m italian so I love me a good word fight. But the purpose of plyometrics is to work on force absorption and force production. The most important part of what I just said is the force absorption. If you cannot absorb force properly, you will not be able to produce force, and if you can’t produce force, your skiing will greatly suffer from it. If you’re thinking, “well shit, I ski just fine right now, and I don’t do plyos,” then my response is to just think of how much better you can ski once you train to unlock your potential and break through your performance ceiling.
The goal with this training is to develop the means in our body to store kinetic energy, transfer it to and from the ground, and use that kinetic energy to propel us in the direction we want to go. To put it into basic terms, think of yourself as a loose, used rubber band, no offense. And think of plyometrics as a tool to make you tighter and more elastic, so that when you are stretched, you shoot forward very far. Without that tool, you’d remain loose, so when you get stretched, you don’t go anywhere except maybe in reverse into the face of the person who tried slinging you. So that’s why we train plyos. They work our body to be able to quickly absorb force, transfer it, build up energy, and ultimately use all of that to produce a great deal of force that will propel you in the desired direction.
Right now I’m just going to talk about programming lower body plyos, however, it’s very important that you also strength train in addition to doing plyos. If you are not strong, you’re not going to be able to absorb force quickly, so all of this won’t be the magic solution you’re looking for. So keep building that strength up as you do your plyos. Click here to watch my YouTube video on strength training for skiing for some workout ideas. 1 piece of advice real quickly, focus mostly on your hamstrings and glutes, not just your quads.
So the way I break down programming plyometrics for skiing (and other sports) is as follows:
1. Absorption
2. Amortization
3. Production
This is the exact method I also strength train, following that Triphasic Training approach where I teach my athletes/clients to first absorb force through that eccentric phase, work on transferring force from absorption to production in the isometric phase, and then using all that to produce force in the concentric phase. No matter what sport my athlete or client partakes in, the first and second major categories (absorption and amortization) remain the same. I keep the same approach to absorbing and transitioning force with everything, but it’s in that production phase where I’ll differ depending on the sport and athlete. Within each of those overarching themes, I break it down even further, for which we’ll start with absorption.
When I’m talking the absorption phase, think of it this way, the landing phase. When you land from a jump, you need to work on absorbing that force, building stability through the lower body and trunk, so that you can eventually use that stored energy to produce more energy. We must be good at absorbing force before we can even think about producing it, and this is the phase that allows us to store that energy within our muscle to then use it right after. So I like to start with basic bilateral plyos. This will help the athlete build stability and strength and start to understand how to absorb force. When we do bilateral plyos, we really want to get all of the lower body involved, so the hip, knees, and ankles. For that, we’re going to start at the bottom, working on the ankles, then move to incorporate the knees, and then finally getting all 3 involved. Some example exercises are as follows: pogo jumps for the ankles, low squat jumps for the knees and ankles, and some actual squat jumps or broad jumps where you can load the hip and involve that hinge.
Next, I move right into unilateral plyos. A lot of people say to wait on unilateral plyos until the bilateral plyos are fully developed, but I don’t necessarily agree with that. Of course it depends on the athlete, yet once I can see the athlete has a basic understanding of plyometrics from that bilateral introduction, I like to get into unilateral relatively soon. This is because it’s pretty low level and a great way to work stability, strength, and absorption in each leg before we progress to more difficult movements. We need to be good at this in both legs, not just 1, so unilateral plyos allow us to work each leg individually. For this, I’ll run my client through some horizontal plyos, vertical plyos, and lateral plyos just to work each major plane of movement. The goal for this is to just work absorbing force, so landing with good stability and strength. Example exercises are a single leg pogo jump, single leg broad jump, and single leg lateral jump. Just work on performing 1 rep of the move, sticking that rep, then performing another. As you progress, you can add more reps without the stick after each, however, during this phase, no matter how many reps you have, you must stick each landing for a second before doing the next rep.
The next part of the absorption phase is what I call Shock Absorption. This is when we really work on generating as much energy as possible when we land to then use in the concentric phase. During this phase, the exercises can be both bilateral and unilateral. The goal is to just work on properly absorbing the force and making your body kinda like a shock absorber. We need to get our body efficient at absorbing force right when we land, so that we can store the energy in our muscles, use the stretch reflex and stretch shortening cycle, and then use that as fuel. Example exercises for this phase are going to be depth drops, tuck jumps with a stick, and tuck jump into a split squat stick. This is not about jumping as high as you can, it’s about properly absorbing the force and landing from the jump in a manner that allows you to store as much kinetic energy as possible to use in the future without letting it dissipate. Producing that power to jump higher comes later.
Okay, now the second major section: amortization. Think of this as the transition phase or the isometric phase. Here, we work on taking the stored energy from the absorption phase and transitioning that absorbed energy into generated energy. The importance of the isometric phase when strength training is to work on motor unit recruitment, increasing the number of muscle fibers that fire, and rate coding, increasing the rate that each of these fibers fire. The same idea applies to this phase of plyometric training. So here, we’ll start incorporating multiple jumps done faster, so we absorb quickly and jump again. I still break it down into unilateral and bilateral, however, instead of shock absorption, I now incorporate reaction.
For unilateral within the amortization phase, it’s the same idea, but I’ll just add more reps. For example, we’ll do 3 single leg broad jumps where each touchdown is as fast as possible or 3 single leg tuck jumps. It’s about taking the absorption phase and now being able to apply the stored energy. So we want to work on decreasing the ground contact time. Don’t rush the movement, it needs to be stable and under control, but we want to spend as little time on the ground as possible. As I stated earlier, the unilateral progression to the amortization phase comes in the form of multiple reps, still horizontal, vertical, and lateral.
Similarly to the unilateral exercises, the bilateral, or connected, exercises stay relatively similar, except now we can add some resistance to them. I’ll have my clients hold some dumbbells when doing pogo jumps or maybe a lightly resisted broad jump, something of that nature where you have to fight against gravity and overcome added resistance to propel in the desired direction.
The reaction aspect of the amortization phase really is all about decreasing the ground contact time, and we’ll start to introduce producing force. By that I mean we’ll do something like a depth jump. So we’ll drop off an elevated platform, land, and immediately go into another jump, maybe a tuck jump, a broad jump, a jump into a split squat stance, etc. This is going to prepare the athlete to put everything together, absorption into transition into production.
The third major category is production. This is when I start to differentiate plyos for a specific sport, in this case, we’re talking skiing. During the production phase, it’s exactly as it sounds: producing force. So we take everything we’ve learned so far and put it together to start working on generating as much power as possible. I do four things for this phase: dead starts, accelerated plyos, max efforts, and sport specific. For the dead starts, this would be a seated box jump for example, a tall kneeling broad jump, or a half kneeling lateral jump. Performing these types of exercises works wonders in creating all out power production. Next, it’d be the accelerated plyos, where there’s a device helping you perform the plyo. The purpose of this is to get your body used to the feeling of more power production than it’s capable of. For this, we’d do an accelerated vertical jump for example, where a resistance band is attached to a higher surface, and you hold it and jump. The help of the band will propel you much further than you could go on your own, training your body to produce that much more force and get the feel of it.
Then it’s the max effort portion of the plyo training – max effort box jump, max effort broad jump. We’re looking to keep pushing the height and distance you can jump. So it’s usually 1, all out movement where I want full on power production, with as much velocity as you can produce. Lastly, it’s sport specific plyos. Here is when I break down the needs of each athlete and the sport, and I program plyos that will apply a stimulus that will specifically aid in the movements of said sport. So with skiing, I’ll include a lot of unilateral exercises since skiing requires unilateral stability, strength, and power. Additionally, I’ll also start to do some connected plyos or integrated plyos, still specific to the sport, where I combine different planes of motion together. So for example, maybe I’ll have my client do a broad jump into a box jump or a lateral jump into a double broad jump.
To make all of this more simplified and less confusing, I’ll give you guys a sample lower body plyometric program with my progressions.
PHASE 1 – ABSORPTION: ABSORB FORCE EFFICIENTLY
Bilateral Exercises:
1. Pogo jumps
2. Low squat jumps
3. Squat jumps
4. Lateral jumps
Unilateral Exercises:
1. Single leg lateral jump to stick
2. Single leg vertical jump to stick
3. Single leg broad jump to stick
4. Single leg 45º bounds with stick
Shock Absorption:
1. Depth drop to stick
2. Tuck jump to stick
3. Depth drop into split squat stick
PHASE 2- AMORTIZATION: DECREASE GROUND CONTACT TIME
Unilateral Exercises:
1. 3 single leg lateral jumps
2. 3 single leg broad jumps to double leg stick
3. 3 single leg vertical jumps to double leg stick
4. Weighted single leg lateral jumps
5. Single leg med ball lateral toss
6. Lateral jumps with med ball cross body reach
Bilateral Exercises:
1. Pogo jumps with dumbbells
2. Weighted low squat jumps
3. Weighted box jumps (low height)
4. Lateral jumps over box
Reaction:
1. Depth jump
2. Depth drop to broad jump
3. Depth jump to split squat stick
4. Depth drop to lateral jump and stick
5. Single leg lateral jump out to med ball lateral toss
PHASE 3 – PRODUCTION: GENERATE LOTS OF FORCE FAST
Dead Starts
1. Seated box jump
2. ½ Kneeling lateral jump
3. Tall kneeling broad jump
Accelerated:
1. Accelerated vertical jump
2. Accelerated broad jump
3. Accelerated split squat jumps
Max Efforts:
1. Box jump
2. Broad jump
3. Vertical jump
4. Single leg lateral jump
Sport Specific:
1.Single leg max box jump
2. Single leg lateral jumps into 45º broad jump
3. Single leg lateral jump into single leg broad jump to double leg land
4. Single leg lateral jump with cross body med ball toss
Alrighty guys well that pretty much wraps this one up! Hopefully it was helpful in showing you how I go about programming and progressing lower body plyometrics, with an insight as to how I specify it for skiing. If you have any questions at all or want me to go more in depth on a topic either in the form of an article or YouTube video, drop me a comment below! Make sure you’re checking out our instagram, @powerlux_fitness, and our YouTube Channel for more athletic workouts and ways to train like an athlete for the everyday person! If you’re interested in working with PowerLux Fitness, if you want programming, training, or a consultant, don’t hesitate to reach out! We have top of the line trainers with experience training professional athletes ready to help you!
Until next time, stay rad ??


One thought on “How to Program & Progress Plyometrics for Athletes: Skiing Edition”
Comments are closed.